Oracle Discoverer Tutorial
| Getting Started with Discoverer |
Oracle Discoverer Tutorial |
Tip: Print this page.
The total estimated time you need to complete lesson 1 is 30 minutes.
The tutorial uses a small database that contains information about a fictitious chain of video stores. The database contains data about the chain's sales, inventory, and stores. You will use this database to get data about the chain of video stores, to analyze the data, and to share the data in the form of Excel spreadsheets and HTML pages.
Note: In order to connect to the video store database, your Discoverer administrator must provide you with the correct login name, password, and database name.
In Lesson 1, you will look at the Discoverer work area and learn the names of Discoverer components that you see on screen, and learn how to use them. To do this, you will connect to the video store database. In the video store database, you will find the sample Workbook that you will use with this tutorial, and you will move through its Worksheets. You will also learn how to find more information about Discoverer in its online Help system.
When you get data from the database, Discoverer shows it to you as a Discoverer Workbook like the one shown below. Compare the list of terms below with the Workbook. These terms are used throughout the tutorial, the online Help system, and in the Workbook Wizard.
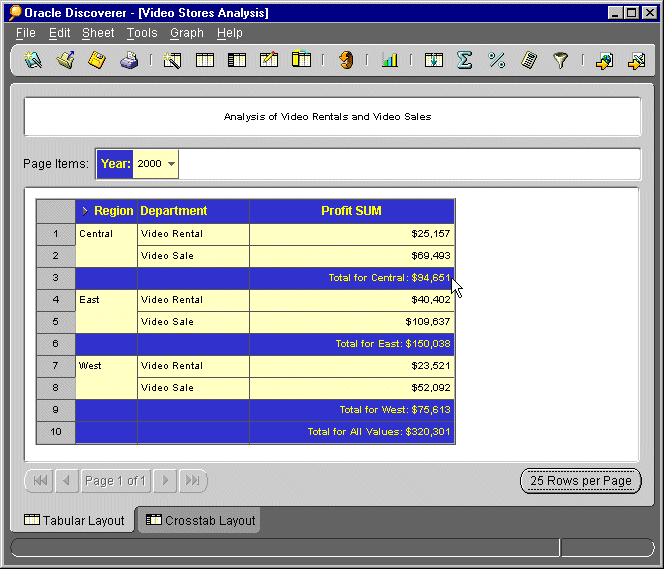
Workbooks. Look at the top of the Video Stores Analysis Workbook. Do you see the words "Oracle Discoverer - [Video Stores Analysis]"? The name of the Workbook you are using appears at the top of the Workbook in brackets, in this case [Video Stores Analysis]. When you change to another Workbook, its name appears in brackets so that you can keep track of which Workbook you are using. A Workbook is a collection of Worksheets.
Worksheets. Look at the bottom of the Video Stores Analysis Workbook. Do you see two tabs that are labeled "Tabular Layout" and "Crosstab Layout"? Each tab is a separate Worksheet. Both Worksheets contain data about the video stores, but each Worksheet is organized differently. Worksheets contain the data you want and allow you to analyze and share it.
Queries. Every time you open a Workbook or create a new one, Discoverer sends a query to your company's database. A query is a question that Discoverer asks the database in order to get the data you want; for example, "what are the total sales for stores in the Eastern region in the last quarter?" Queries are written in SQL, a language that databases understand. You do not need to understand SQL to communicate with the database. Discoverer writes the SQL for you.
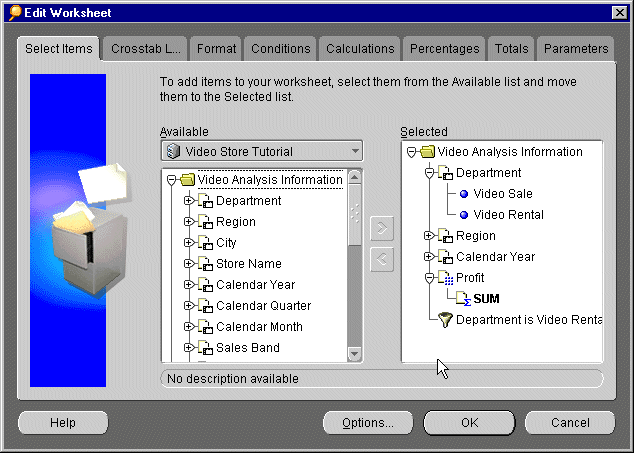
Items. Look in the main section of the Worksheet. Notice that data is organized in rows and columns similar to a spreadsheet. The rows and columns contain the data that answers the query Discoverer asked the database. Do you see the column headings "Region", "Department", and "Profit SUM"? In a Worksheet, column and row headings identify Items. An Item contains a set of data that is stored in your company's database; for example, the Item "Region" contains all the regions that have video stores. In Lesson 2, you will create your own Workbook, and you must select Items from the database.
Page Items. Look above the column headings at the area named Page Items. Do you see the words "Year: 2000"? This database contains data for three years: 1998, 1999, and 2000. This page only shows data for 2000. When a column heading appears above all the other Items, it is called a Page Item. By selecting different Page Items from the Page Item drop-down list, you are actually switching pages within that Worksheet. In Lesson 3, you will use Page Items to switch between pages within a Worksheet.
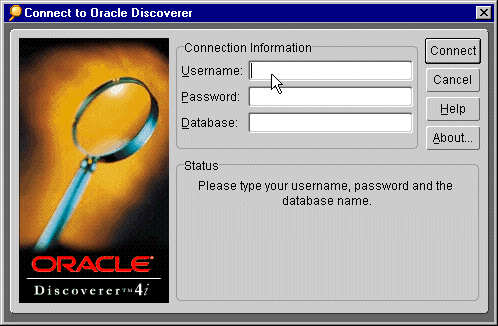
The Discoverer administrator at your company provides you with the information you need to connect to your company's database. The Discoverer administrator should provide you with the URL, or Web address, for connecting to Discoverer. The administrator should also provide you with a user name, password, and the name of the database. You need this information before you can connect to the database and before you can use Discoverer. Your administrator may give you a different password and database name specifically for the video store database. If so, use the video store's connection information in the instructions below.
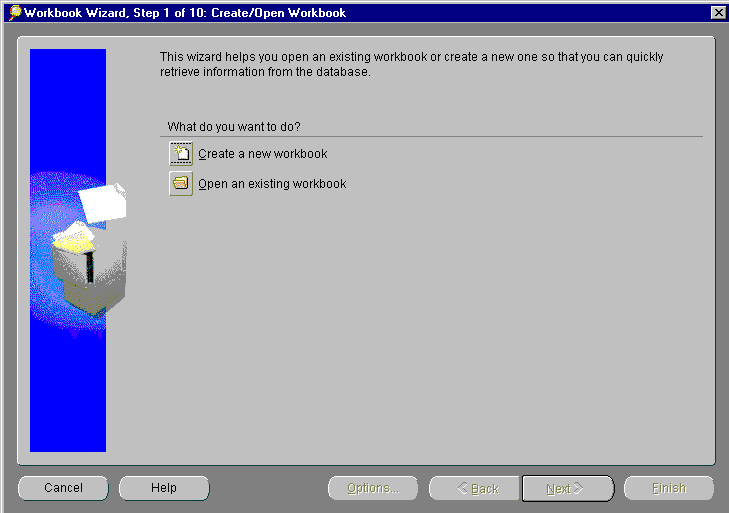
NOTE: If you do not see the Workbook Wizard screen, you may have entered the wrong connection details. Re-enter
the connection details and try again. If you cannot connect to Discoverer, contact your Discoverer Administrator.
You are now connected to the database and can begin working through the tutorial. Begin by Opening an existing Workbook.
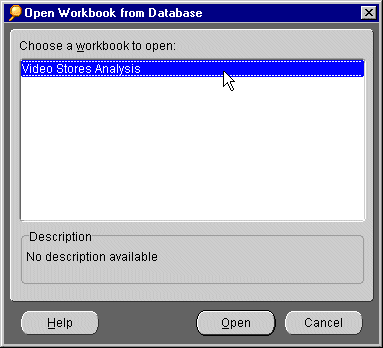
You are going to open the tutorial Workbook that you will use with this tutorial. The tutorial Workbook is saved in the video store database. Your Discoverer Administrator will tell you the name of the Workbook that you need to open. In this tutorial, the Workbook is called Video Stores Analysis.
Note: Your Discoverer Administrator may have given this Workbook a different name. For example, your Discoverer Administrator may choose the name, Video Analysis Tutorial. If so, choose the Workbook name provided by your Discoverer Administrator.
The sample Workbook, Video Stores Analysis, appears.
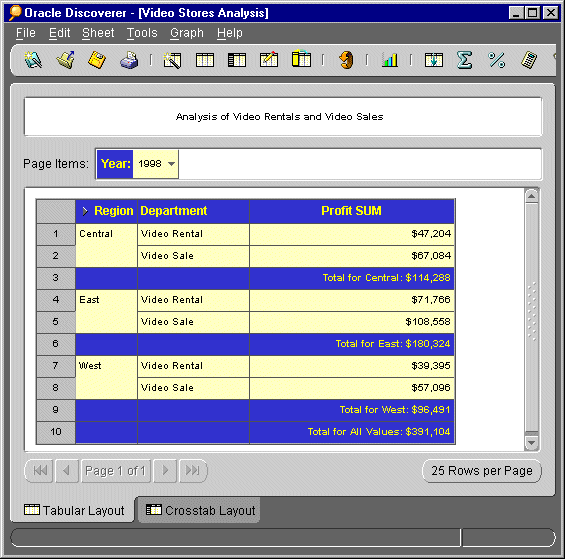
The Video Stores Analysis Workbook automatically opens to the Tabular Layout Worksheet as shown above. The Video Stores Analysis Workbook also contains another Worksheet, called Crosstab Layout.
Discoverer sends a query to the database and presents the data to you as another Worksheet.

Notice that the Tabular Layout Worksheet and the Crosstab Layout Worksheet both contain information about the video stores. However, the information is organized differently in the two Worksheets. When you create your own Workbooks, you can group related Worksheets together as a single Workbook in this way.
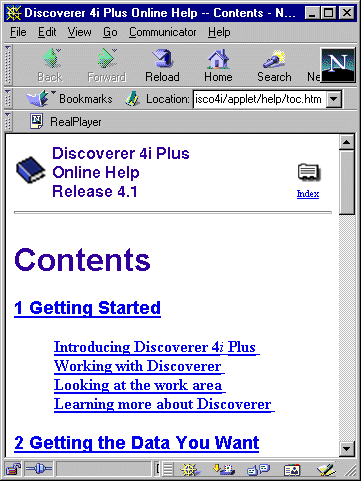
Although you are probably familiar with using online Help, take a moment to familiarize yourself with Discoverer's online Help. When you need help, use the online Help system to find procedures for complicated tasks, examples, and definitions of terms. There are two ways to get help:
Use the online Help system at any time you have a question about using Discoverer. However, if you are looking at a Discoverer dialog on screen and you do not know how to use its buttons and text fields, use the dialog's context-sensitive Help button.
To get help from the online Help menu:
Notice other links that point to related topics, one of which might be the one you want.
An alphabetical list of index entries appears.
There are two related topics under sharing Workbooks. They are name 1 and 2.
You will see help relating to that topic.
To get help with context-sensitive Help buttons:
Most Discoverer dialogs contain context-sensitive Help buttons. Click these Help buttons to get
assistance with using the dialog.
Test how well you learned Lesson 1 by answering the questions below. If you are using the tutorial online, click the word Answer after each question to see its answer. If you printed out the tutorial, the answers are located at the very bottom of the lesson's last page.
What is the difference between a Workbook and a Worksheet? Answer.
What is the difference between an Item and a Page Item? Answer.
How do you switch between pages of a Worksheet? Answer.
How do you switch between different Worksheets in the same Workbook? Answer.
What is the Workbook Wizard? Answer.
Congratulations on finishing Lesson 1. Now you have learned how to connect to a database from Discoverer and how to open a Workbook that is saved in a database. You also know the main features of a Workbook, such as Worksheets, Items, and Page Items. And you know that at any time you need help using Discoverer, you have two choices: the online Help system and the context-sensitive Help buttons found on Discoverer dialogs.
What is the difference between a Workbook and a Worksheet?
A Workbook is a collection of related Worksheets. For example, you may choose to have a Workbook with separate Worksheets for Sales by Region, Sales by Department, and Sales by Product; each Worksheet contains sales information grouped by region, department, and product.
A Worksheet contains data that answers the query Discoverer asks the database; for example, the Sales by Region Worksheet contains data that answers the question (query) "What are my company's sales for the Eastern, Central, and Western regions?"
What is the difference between an Item and a Page Item?
An Item identifies a specific set of data in the database; for example, if you want to see all departments in the database, you select the Department Item. In Lesson 2 you will learn how to select Items from the database with the Workbook Wizard. On a Worksheet, Items appear as column and row headings, and in Lesson 3 you will learn how to rearrange Items on a Worksheet.
A Page Item is a special Item that groups all the data on a page; for example, data can be grouped by the years 1998, 1999, or 2000. On a Worksheet, a Page Item appears above all the other column headings. In Lesson 3 you will learn how to create Page Items and how to switch between them.
How do you switch between pages of a Worksheet?
If your Worksheet contains more than one page, you can switch between pages by switching Page Items. For example, if you group data on a page by year, you can switch the year Page Item to 1998, 1999, or 2000. In Lesson 3 you will learn how to switch Page Items and how to create your own.
How do you switch between different Worksheets in the same Workbook?
If there is more than one Worksheet in a Workbook, click a tab located at the bottom of the Workbook to switch between Worksheets. The first time you click a tab, Discoverer may ask you if you want to run the query for that Worksheet, (depending on how Discoverer is configured in the Tools\Options\General tab). If you choose Yes, or if Discoverer is configured to automatically run the query, Discoverer retrieves the most current information for that Worksheet from the database. Each Worksheet has its own query.
The Workbook Wizard is a Discoverer tool that helps you create new Workbooks or Worksheets. The Workbook Wizard automates much of the work of creating Worksheets, including writing SQL queries and sending them to the database for you. In Lesson 2, you will use the Workbook Wizard to create a new Worksheet.
Copyright © 2000, Oracle Corporation. All rights reserved.